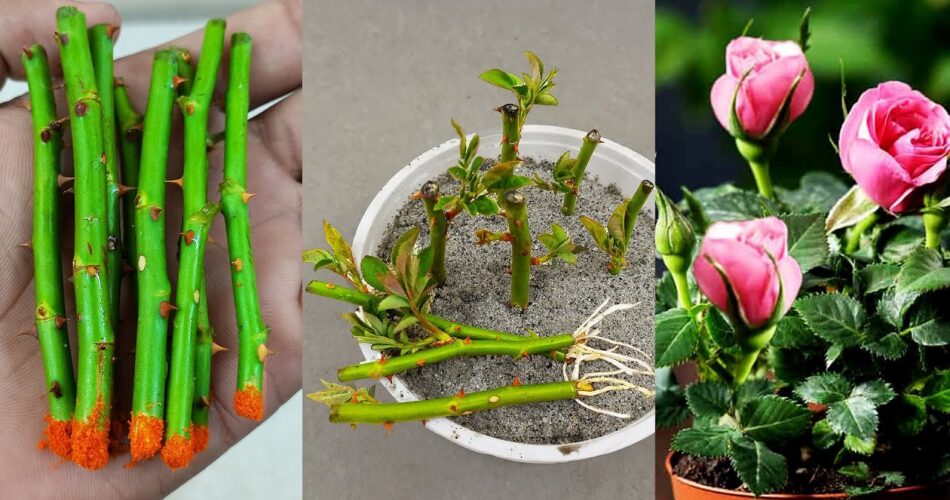
Growing roses from cuttings can be a rewarding and cost-effective way to propagate your favorite rose plants. With a few simple steps and a bit of patience, you can grow healthy rose plants that will bloom beautifully in your garden. Here’s a guide to help you get started quickly and easily.
Materials Needed
- Sharp pruning shears
- Rooting hormone (optional but recommended)
- Small pots or containers
- Potting mix or soil
- Plastic bags or a propagator
- Water
- Labels and markers
Step-by-Step Guide
1. Choose the Right Time
The best time to take rose cuttings is in late spring or early summer when the plant is actively growing. This period provides the optimal conditions for root development.
2. Select a Healthy Parent Plant
Choose a healthy, disease-free rose plant. Look for strong, new growth that is about the thickness of a pencil. Avoid using stems that have flowers or buds.
3. Take the Cuttings
Using sharp pruning shears, cut a stem that is 6-8 inches long. Make the cut just below a leaf node (the point where leaves attach to the stem). Remove any flowers or buds, and strip off the leaves from the bottom half of the cutting.
4. Prepare the Cuttings
Dip the bottom end of the cutting in rooting hormone powder or gel. This step is optional but helps to promote faster root development.
5. Plant the Cuttings
Fill small pots or containers with a potting mix or soil. Make a hole in the soil with a pencil or stick, and insert the cutting into the hole. Firm the soil around the cutting to ensure it stays upright.
6. Create a Humid Environment
Cover the pot with a plastic bag or place it in a propagator to create a humid environment. This helps to prevent the cutting from drying out. Ensure the plastic does not touch the cutting by using sticks or supports if necessary.
7. Provide Proper Care
Place the pot in a location with bright, indirect sunlight. Avoid direct sunlight as it can be too harsh for the cuttings. Water the soil lightly to keep it moist but not waterlogged. Overwatering can cause the cutting to rot.
8. Monitor Progress
Check the cuttings regularly for signs of root development. This can take anywhere from a few weeks to a couple of months. Gently tug on the cutting after a few weeks to see if there is resistance, indicating root growth.
9. Transplanting
Once the cuttings have developed a good root system, they can be transplanted into larger pots or directly into the garden. Be sure to harden them off first by gradually exposing them to outdoor conditions.
Tips for Success
- Use Healthy Cuttings: Ensure the cuttings are taken from a healthy, vigorous plant to increase the chances of successful rooting.
- Maintain Humidity: Keeping the environment humid is crucial for preventing the cuttings from drying out.
- Be Patient: Rooting can take time, so be patient and avoid disturbing the cuttings too frequently.
Growing roses from cuttings is a simple and rewarding way to expand your garden. By following these steps, you can enjoy beautiful, blooming roses in no time.


